Clinical Guidelines, Pressure Dynamics, and Operational Troubleshooting
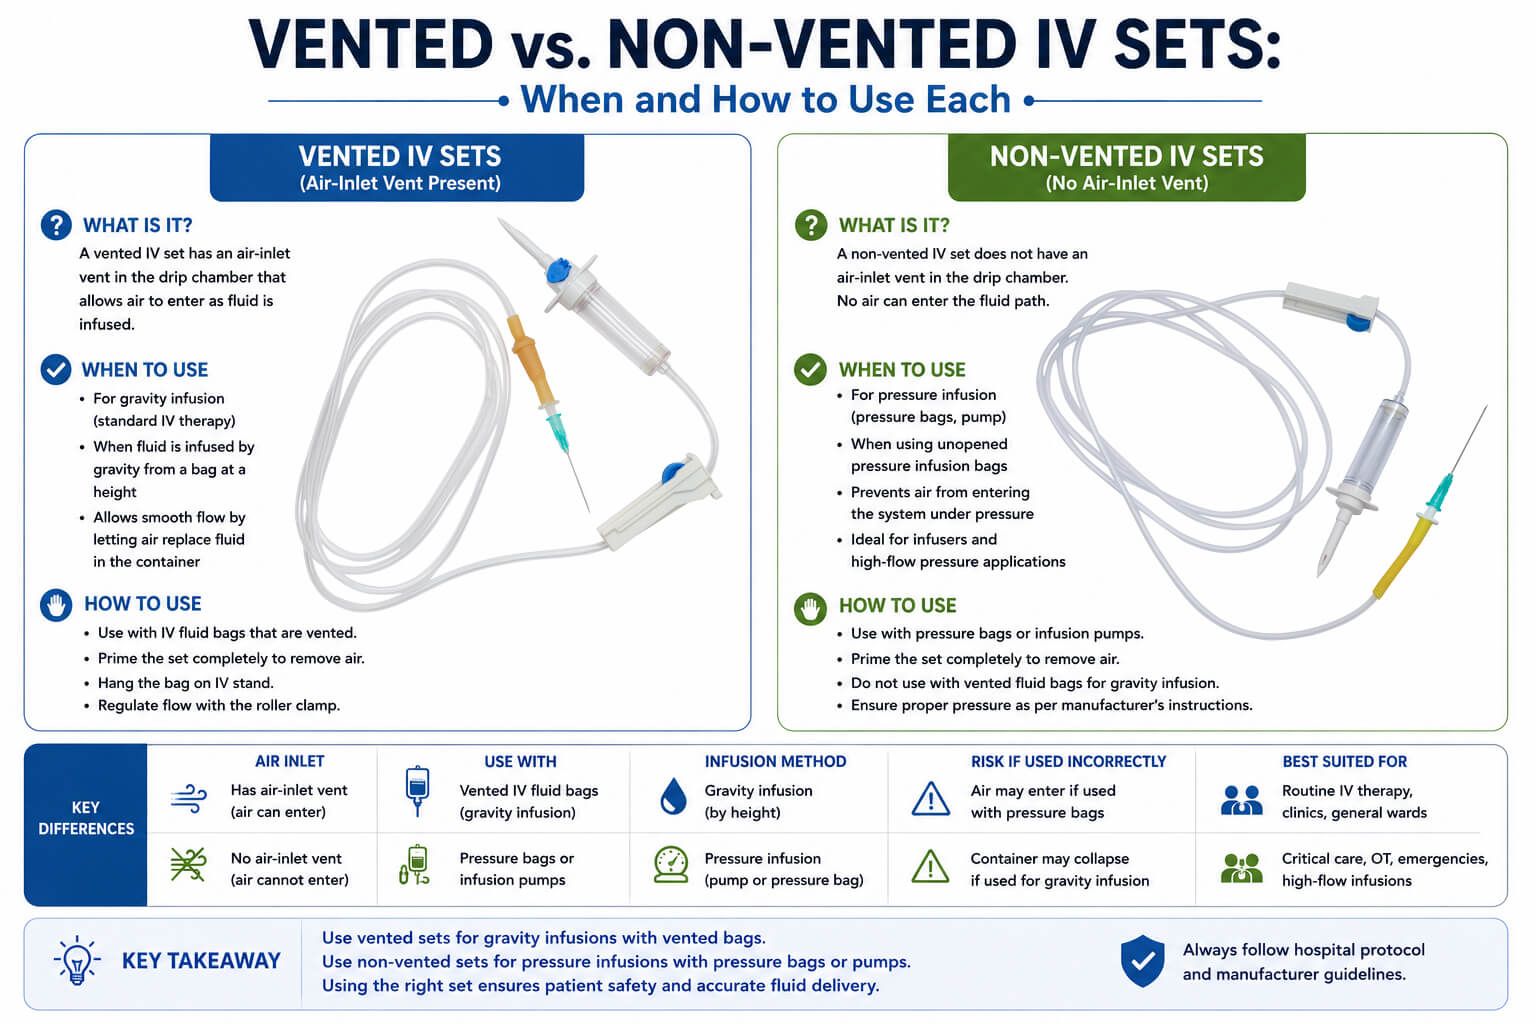
Intravenous (IV) therapy is one of the most common invasive clinical interventions in modern healthcare. Delivering crystalloids, colloids, blood products, and specialized medications directly into the venous system requires a reliable, sterile, and calibrated fluid pathway. While much clinical training focuses on vascular access, catheter selection, and infusion rate calculations, the mechanics of fluid administration tubing are equally vital.
A fundamental operational distinction in fluid mechanics is the choice between vented and non-vented IV administration sets. Using the incorrect set or mishandling the venting mechanism can lead to stalled infusions, flow rate drift, drug waste, aerosolization, fluid leaks, and compromised sterility. This guide explores the physical principles, container engineering, clinical indications, step-by-step handling protocols, and troubleshooting steps for vented and non-vented IV sets.
1. Fundamentals of IV Infusion Physics
Fluid moves along a pressure gradient from high pressure to low pressure. In an IV infusion system, the driving pressure is primarily hydrostatic pressure determined by the vertical height of the fluid container relative to the patient’s vein, minus resistive forces across the tubing, filters, and cannula. However, the pressure dynamic inside the container itself dictates whether fluid can exit:
- Positive/Atmospheric Pressure Inside Container: Fluid exits smoothly via gravity or pump action.
- Negative Pressure (Vacuum) Inside Container: As fluid volume drains without container deformation or air displacement, internal pressure drops below atmospheric pressure. This creates a vacuum that pulls backward against the hydrostatic column, slowing down and eventually halting fluid movement entirely.
2. Anatomical Comparison: Vented vs. Non-Vented Sets
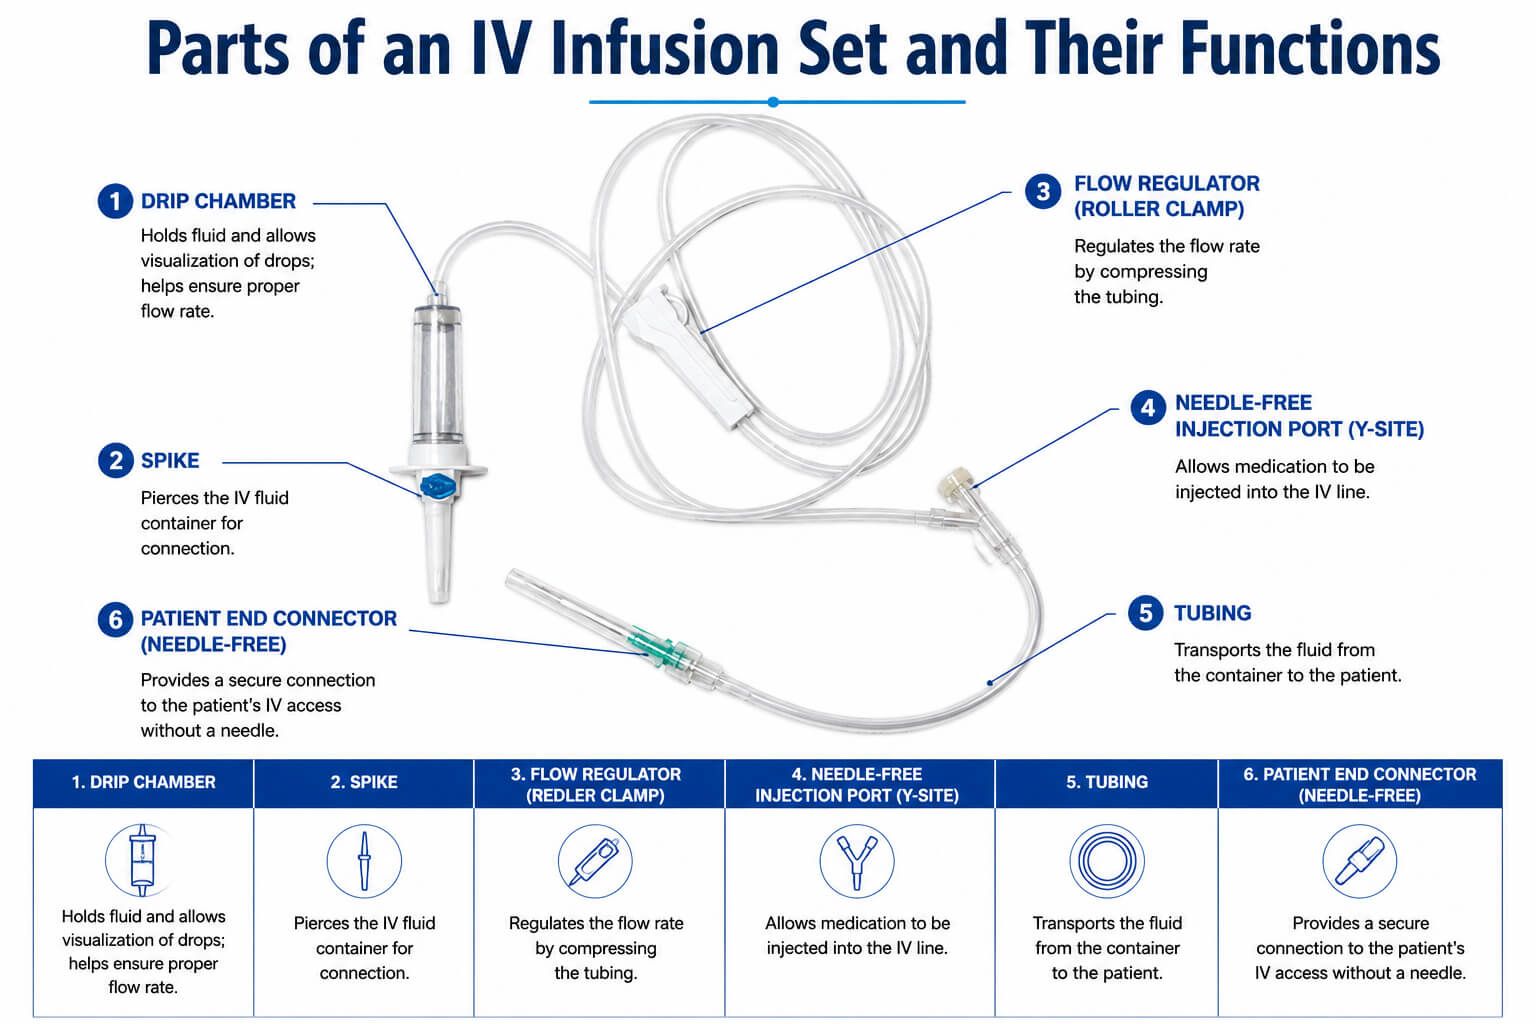
The structural divergence between vented and non-vented sets resides primarily at the proximal spike assembly. The rest of the line—including the drip chamber, flow regulators, injection sites, and terminal Luer lock—remains functionally identical across standard configurations.
| Feature | Vented IV Infusion Sets | Non-Vented IV Infusion Sets |
| Spike Structure | Dual-lumen spike: Contains a primary fluid conduit and a secondary air inlet channel. | Single-lumen spike: Contains only the primary fluid conduit. |
| Air Vent Port | Present at the base/shoulder of the spike housing, fitted with a hinged seal or plug. | Absent entirely; solid molded plastic housing. |
| Air Filtration | Integrated 0.2-micron hydrophobic membrane allowing gas exchange while repelling liquid and pathogens. | No air filtration required because air does not enter the line. |
| Primary Container Matching | Rigid glass bottles, semi-rigid plastic bottles, and glass vials. | Fully collapsible flexible bags (PVC, polyolefin, EVA). |
| Operating Principle | Continuous air displacement equalizes container pressure with atmospheric air. | Atmospheric pressure collapses container walls inward as fluid volume vacates. |
| Cross-Compatibility | Convertible: Can be used on flexible bags if the vent cap is kept snapped closed. | Non-convertible: Cannot be used on rigid containers without a separate venting needle. |
3. Container Types and Material Interactions
A. Rigid Glass Containers
Examples & Material: Nitroglycerin, Paclitaxel, Mannitol (20%), Human Albumin (5% & 25%), Propofol. Made of chemically inert borosilicate or soda-lime glass to prevent drug sorption.
Pressure & Tubing: Glass cannot collapse. A Vented IV Set is strictly required. Without an open vent, negative pressure halts fluid flow after 10–30 mL.
B. Semi-Rigid Plastic Bottles
Examples & Material: High-volume electrolytes, amino acid formulations, specialized IV paracetamol bottles, and antibiotic premixes (HDPE / Polypropylene).
Pressure & Tubing: Wall stiffness resists collapse, causing irregular flow and pump alarms unless a Vented IV Set is opened.
C. Fully Collapsible Flexible Bags
Examples & Material: 0.9% Normal Saline, Lactated Ringer’s, 5% Dextrose (D5W) in PVC, EVA, or polyolefin bags.
Pressure & Tubing: Collapses symmetrically under ambient pressure. Requires a Non-Vented IV Set (or a vented set with the vent cap firmly closed).
4. When to Use Each Type: Clinical Indications
Use Vented Sets For:
• Infusions from glass containers (e.g., Nitroglycerin, Paclitaxel) to prevent vacuum stall.
• Viscous colloid and protein solutions (Albumin, IVIG) requiring steady laminar flow.
• Semi-rigid polymer bottles without automatic collapsible chambers.
Use Non-Vented Sets (or Closed-Vent Sets) For:
• Routine crystalloid hydration (Saline, Ringer’s, D5W) in flexible bags.
• Secondary ‘piggyback’ lines where hydrostatic pressure drives one-way backcheck valves.
• Pressurized rapid infuser cuffs (keeping vents closed prevents fluid blowout through filters).
5. Step-by-Step Clinical Handling Protocols
Protocol A: Priming a Vented Set on a Rigid Glass Bottle
1. Inspect & Prep: Verify orders, check glass for hairline fractures, clean rubber stopper with 70% alcohol for 15s, and allow to dry.
2. Close Clamps & Vent: Ensure BOTH the roller clamp and the spike air vent cap are CLOSED before spiking to prevent fluid leakage.
3. Spike Perpendicularly: Push the spike straight downward into the center of the rubber stopper using a steady twisting motion without rocking.
4. Invert & Fill Chamber: Invert the bottle onto the IV pole. Compress and release the drip chamber until filled 1/3 to 1/2 full.
5. Open the Air Vent: Pop open the air vent cap on the spike shoulder. Air bubbles will rise to establish equalized atmospheric pressure.
6. Prime & Connect: Slowly open the roller clamp, purge all air bubbles from the line and Y-ports, lock clamp, and connect to the catheter.
Protocol B: Setting Up a Non-Vented Set on a Flexible Bag
1. Inspect Container: Check bag integrity and seal. Swab port septum with antiseptic wipe.
2. Lock Roller Clamp: Move roller clamp to fully occluded position.
3. Verify Vent Status: If using a convertible vented set, ensure the air vent cap is firmly SNAPPED CLOSED.
4. Spike & Prime: Insert spike, invert bag onto pole, fill drip chamber 1/3 to 1/2 full, and flush tubing completely before patient attachment.
6. Comprehensive Clinical Troubleshooting
| Clinical Scenario | Root Cause | Corrective Action |
| Infusion stops dripping after 15–30 mL from a glass bottle. | Air vent is closed, missing, or blocked, creating internal vacuum. | Check spike assembly and pop open vent cap, or insert a sterile venting needle. |
| Fluid leaks from the air vent port of a vented set. | Hydrophobic membrane wetted out by shaking or used on compressed flexible bag. | Close vent cap immediately. If membrane is saturated, replace with a fresh sterile set. |
| Drip chamber overfills completely (‘flooded chamber’). | Excessive squeezing or pressure spikes during priming. | Invert entire container, squeeze fluid back into container, and re-establish 1/3–1/2 level. |
| Air continually enters lower tubing despite no leaks. | Drip chamber level is too low (<1/3 full), allowing vortexing. | Clamp line, squeeze drip chamber to midpoint, and purge trapped bubbles via Y-port. |
| Pump triggers ‘Upstream Occlusion’ on glass bottle. | Upstream vacuum from closed/wetted air vent prevents rotor pull. | Open vent cap, inspect filter for fluid saturation, and clear label obstructions. |
7. Safety, Filtration, and Best Practices Summary
The air vent contains a 0.2-micron hydrophobic PTFE or acrylic membrane that permits sterile air entry while blocking microbial contamination and preventing fluid egress under normal hydrostatic pressure. However, surfactant-containing solutions or direct fluid contact during rough inversion can wet out the filter.
- Identify Container Physics: Glass/semi-rigid = Vented set (vent OPEN); Flexible bag = Non-vented/convertible (vent CLOSED).
- Spike Vertically: Insert spike straight through the rubber stopper without rocking to prevent core fragmentation.
- Monitor Chamber Levels: Maintain fluid at 1/3 to 1/2 capacity to prevent air column vortexing into the line.
- Convertible Set Vigilance: Train clinical staff to inspect vent cap status on universal sets during container handovers.